Requirements
1. An operational NPS server
2. An operational graylog server
3. A server to host PAN user-id agent
Major Steps
Step 1: Setup Radius logging on NPS
Step 2: Install nxlog to monitor log file on NPS
Step 3: Setup graylog input for incoming messages from nxlog
Step 4: Add syslog output plugin to graylog and output
Step 5: Setup PAN user-id agent to accept graylog
Step 6: Setup connection to user-id agent on PAN
Step 7: Verify user/ip mapping in user-id agent
Step 1: Setup Radius logging on NPS
I won't go into details about how to set up NPS so you should already have an operational NPS server. However, it is rather easy to log NPS activity to a text file.
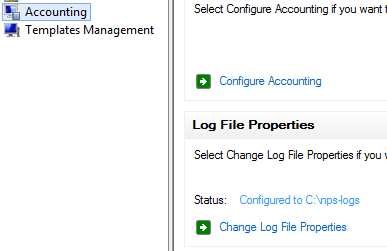
Start by opening the Network Policy Server console and go to the accounting tab and click change log file properties.
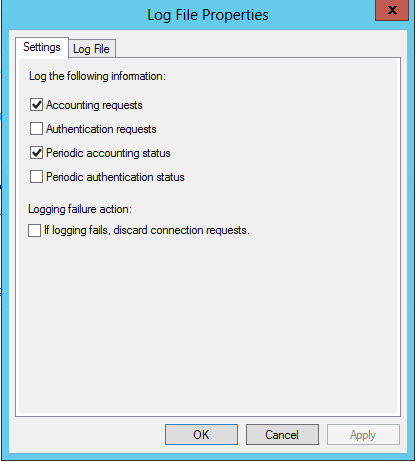
Select accounting requests and periodic accounting status. You may select the other 2, but I've found it makes the log file extremely large. I've looked for documentation on the differences between the two and haven't found anything that thoroughly explains it.
Click on the log file tab and set the directory you wish to log to, change the format to ODBC (Legacy), and choose daily.
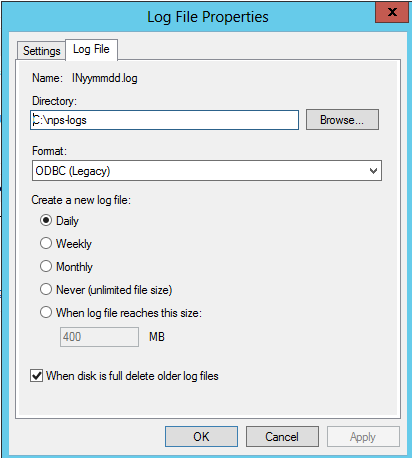
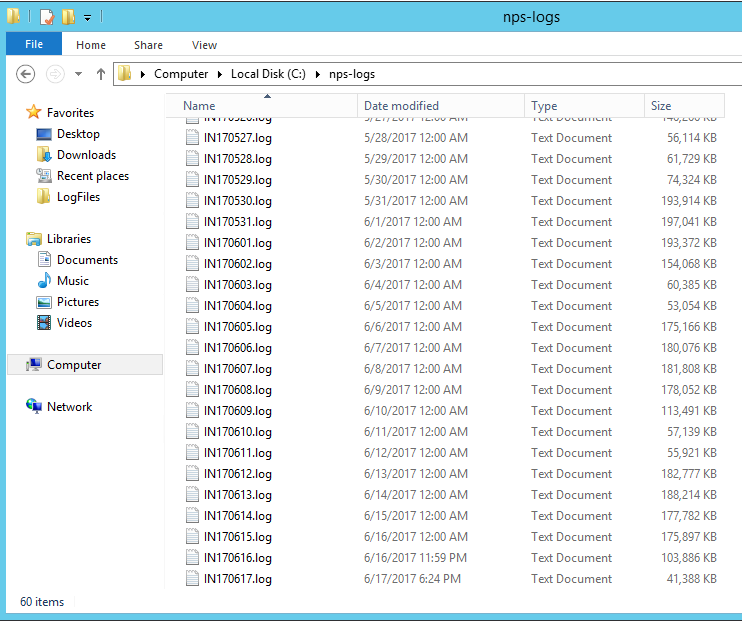
Verify that a log file was created by navigating to the folder you specified. The file should be named in a format of INYYMMDD.log.
Step 2: Install nxlog to monitor log file on NPS server and output to graylog
Download the latest windows installer for nxlog community edition from https://nxlog.co/products/nxlog-community-edition/download.
Install on the NPS server. Proceed to C:\Program Files (x86)\nxlog\conf (the default install location) and replace the nxlog.conf contents with the following here: network policy server. Substitute any IPs for your environment.
Start the nxlog service to begin forwarding to the graylog server.
Step 3: Setup graylog input for incoming messages from nxlog and create extractors
Log into graylog as an administrator and proceed to System/Inputs. Select Syslog TCP and click Launch new input.
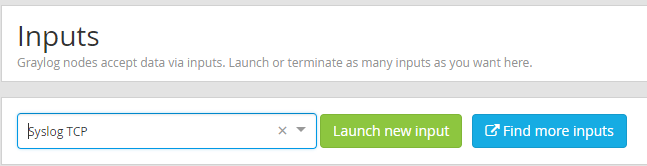
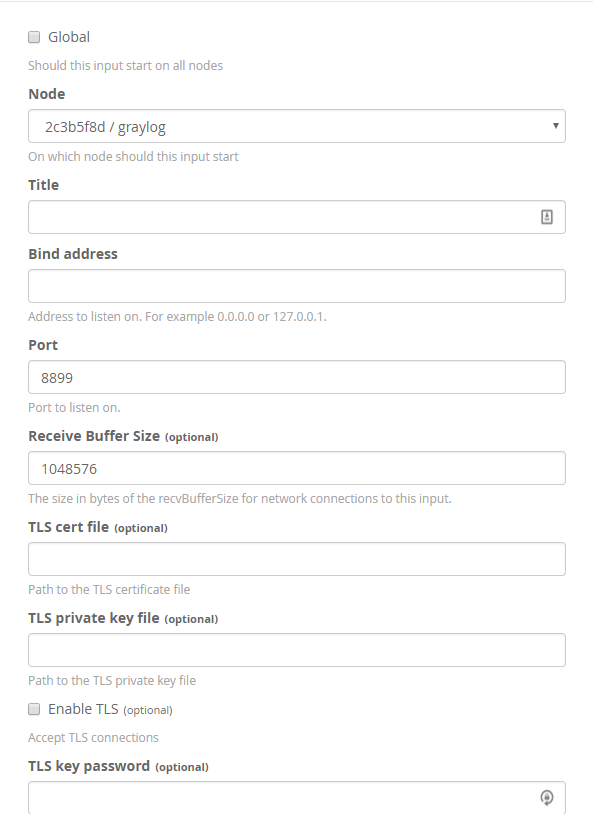
Select your graylog node. set the bind address to fit your environment and set the port to receive the nxlog messages on. The port field must match what you set in the nxlog.conf file previously. I also put a value into the Override Source field so that I can easily create a stream to output from in later steps. This will make all messages that arrive on this input have the same source.
After saving, go back to the input you just created and click on manage extractors. Here you'll create some split and index extractors that will create fields from the raw syslog and then be output to the PAN user-id agent for parsing. I created the following 4 fields.
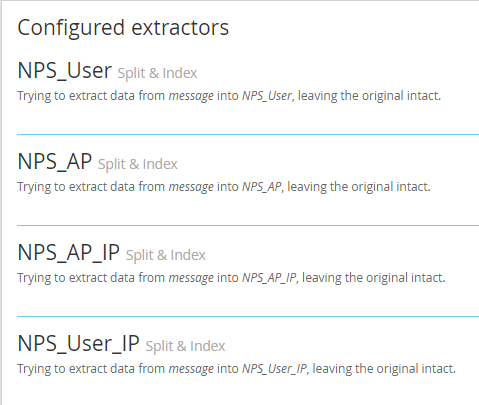
When you create a split and index extractor it will load a full message. use a comma in the split by field and find the target index. In this case the username I want to extract was the 6th item being comma delimited. I created 4 fields using the above extractors.
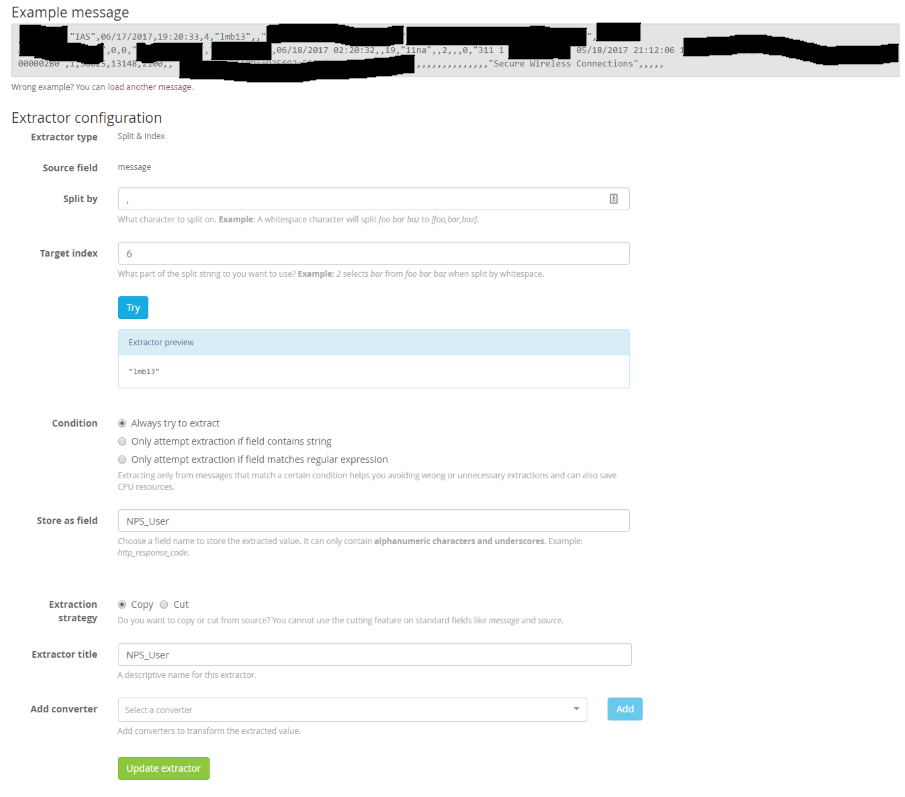
The target indexes for each field were the following:
NPS_User = 6
NPS_User_IP = 11
NPS_AP = 12
NPS_AP_IP = 13
The two fields that have 'AP' in the title aren't needed for the user-id mapping, but I just wanted to extract them for any future graylog dashboards I might build. e.g. User logins per AP or something along those lines.
Step 4: Add syslog output plugin to graylog and output to another server running PAN user-id agent
Now that the input is receiving messages from nxlog on the NPS server and fields are being extracted we want to send those messages to a server hosting the PAN user-id agent. By default graylog does not have a method to output syslog to another syslog server.
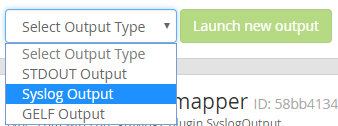
Go to https://github.com/wizecore/graylog2-output-syslog#how-to-use and follow the instructions to install the graylog2-output-syslog plugin. After installing the plugin successfully, go to System/Outputs, select Syslog Output, and click Launch new output.
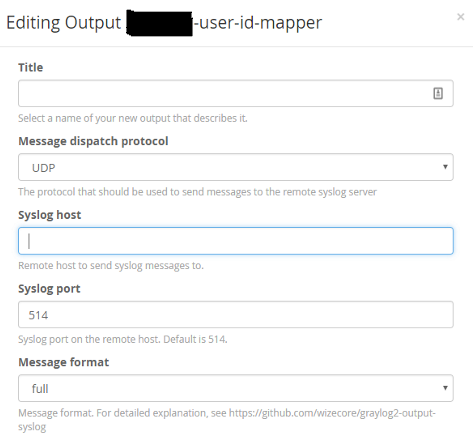
Title the output to your liking. Fill in the Syslog host field with wherever the PAN user-id agent will be running. Click save.
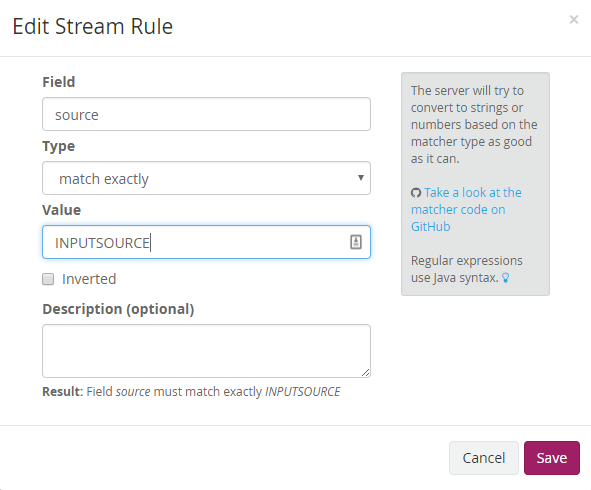
Next, go to Streams and click Create Stream. I selected Remove matches from 'All Messages' stream so that I won't see NPS logs in my main search. This is optional. Click save.

Click manage rules for the stream. Click Add stream rule. Use the following settings and set the Value field to what you set the override source to during the input creation in step 3. Click I'm done!

Now, click Manage Outputs. Click the Select existing output dropdown, select the previously created output, and click Assign existing Output. At this point the graylog server should be receiving the NPS logs from nxlog, extracting fields from the input, mapping messages to the proper stream, and sending the logs with extracted fields to a server with the PAN user-id agent.
Step 5: Setup PAN user-id agent to accept graylog output and parse using regex
I opted to host the PAN user-id agent on another windows server. You could probably put this on your NPS server, but I wanted to avoid overtaxing the server since it is used for all wireless logins in my network.
In any case, download the user-id agent by going to https://support.paloaltonetworks.com and logging in with your Palo Alto Networks support account. Install the application.
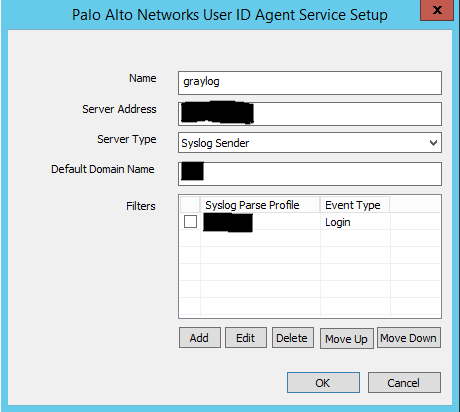
Go to the setup tab and click edit. Proceed to the syslog tab and enable the syslog service. Click Add.
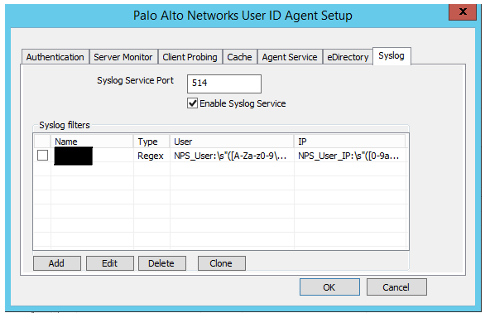
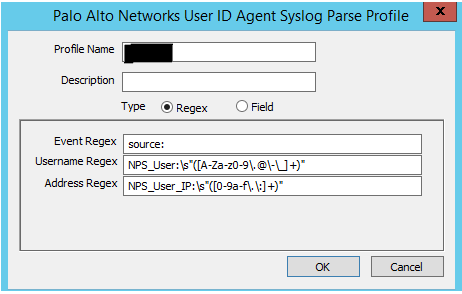
Choose regex and fill in the following to parse the incoming graylog syslog messages. Click ok twice.
source:
NPS_User:\s"([A-Za-z0-9\.@\-\_]+)"
NPS_User_IP:\s"([0-9a-f\.\:]+)"
Go to the discovery tab and click add
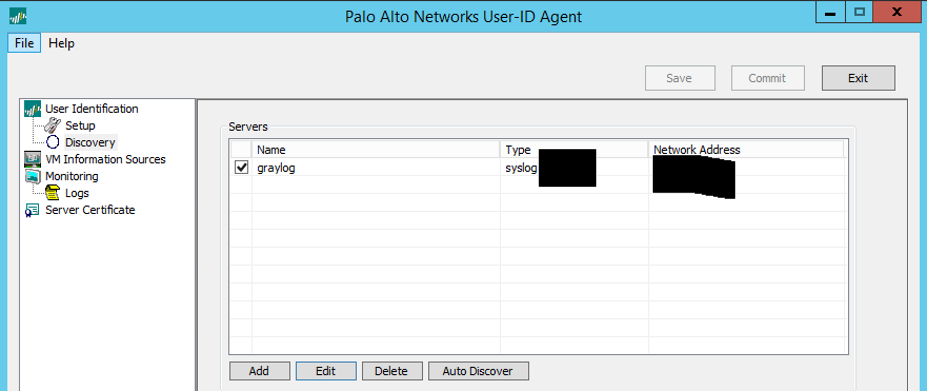
Name it whatever you like, set the server IP, and server type to syslog sender. Click add below the filters section and add the filter you made from the Setup tab. Choose Event Type Login.
Go to the monitoring tab and you should begin to see IP to user mapping start populating.
Step 6: Setup connection to user-id agent on PAN firewall
Login to the PAN firewall and go to Device/User Identification/User-ID Agents. Click Add. Fill in the Name, Host, and Port fields. The host and port fields must match the settings on the server hosting the user-id agent. After clicking ok you should see the connected status light turn green.

Step 7: Verify user/ip mapping in user-id agent application and check on PAN firewall
Go back to the user-id agent, find a user name that is mapped and take note of the user name. Proceed to the monitoring tab on the PAN firewall web gui and add the following filter substituting the user you're looking for.
( user.src eq 'USERNAME' )